Friday, May 30, 2014

Lightning Fast Language Learning

I received free product to facilitate this honest review.  
All opinions expressed are my own.

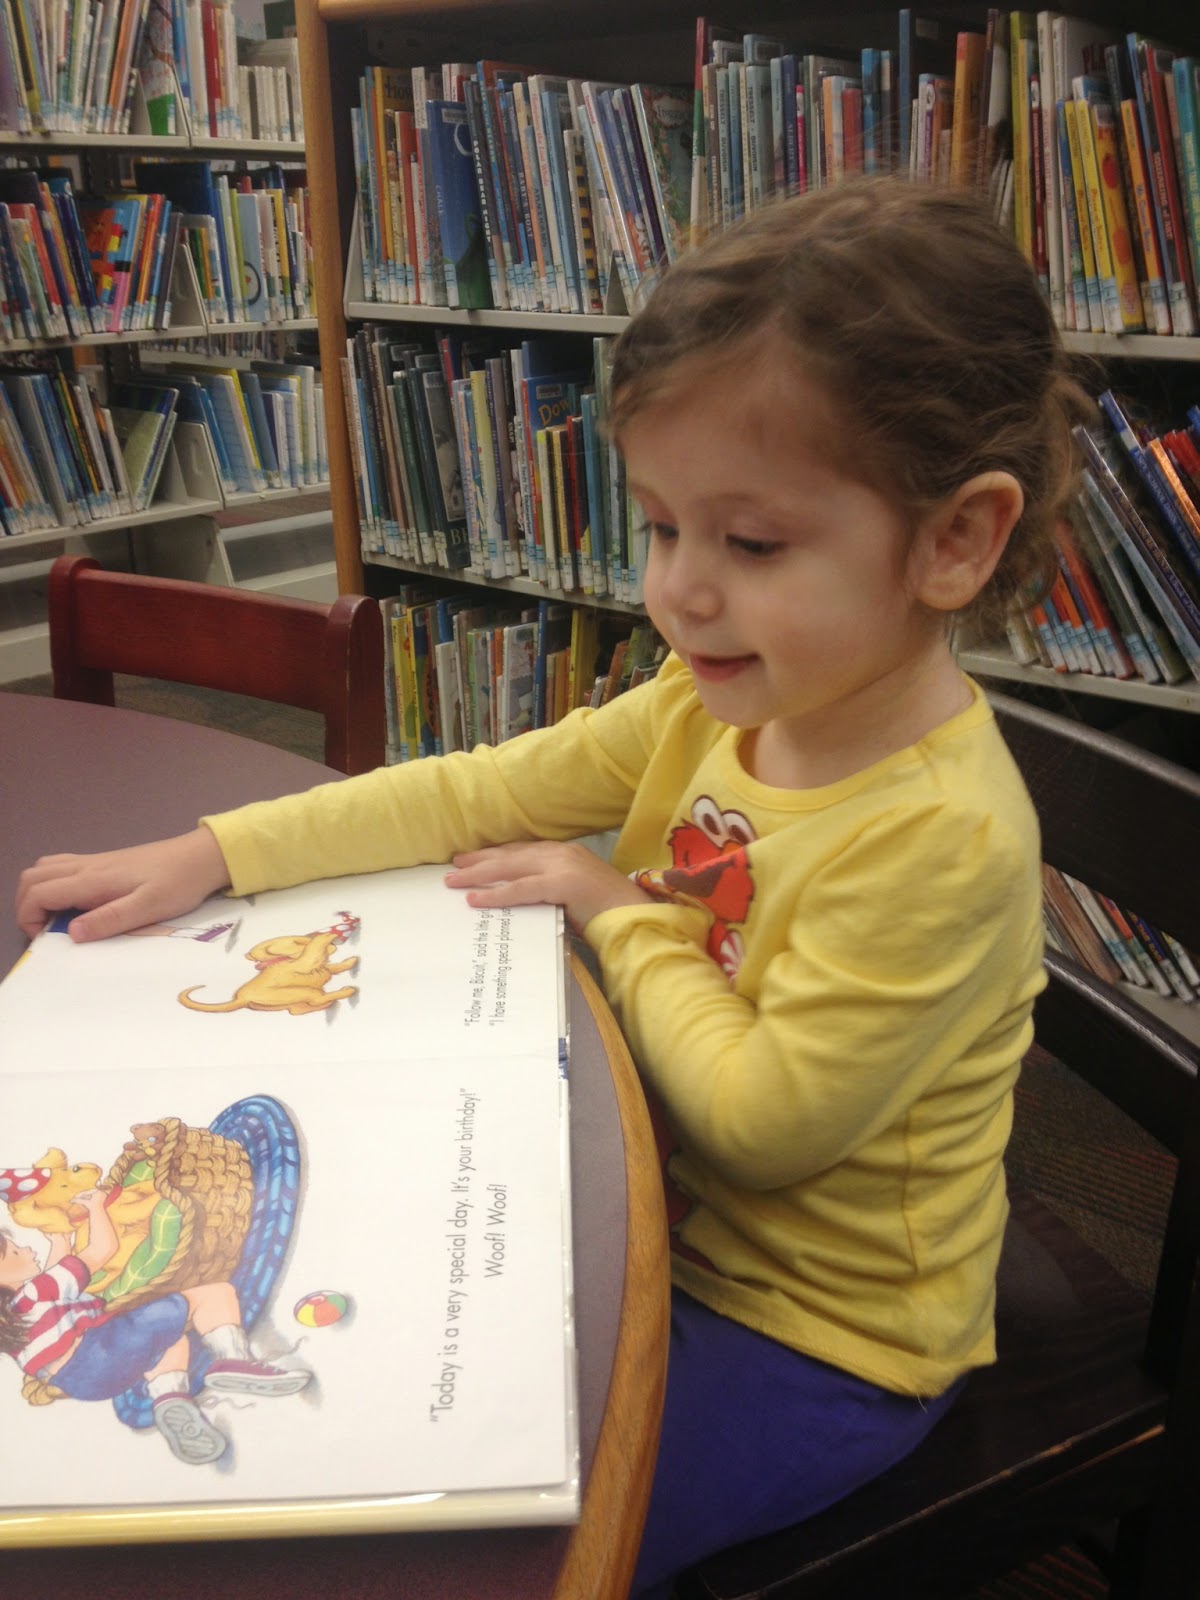
Yesterday I wrote about why I don't buy books for my child... and now today I'm going to encourage you to buy books for your child.  Hooray for consistency!

Let's be honest.  I do sometimes buy books.  And thank goodness I do, because last night, after I wrote my blog post about how she doesn't read the books she owns, she asked me to read her own books before bed instead of library books!

Some of the books we own still do collect dust on the bookshelf, but we do have them just the same.  Some books are classics and you just want to own them.  My daughter really loves books that have the Caldecott Medal and Honor seal on them.  She gets all excited to read them.  Thankfully our library has a section reserved just for them so they are easy to find!  Most of those books are amazing, so of course when we spot them in the stores or online, we scoop up our favorites and add them to our collection.  She often doesn't read them again once we own them but we still have them and I know that someday, when she goes to read to her own children, she'll be thankful that we have them!  We also typically give her the option to choose books to purchase when we take family trips to the Used Book Store.  She will typically choose a couple, love on them for a few days, and then move back to her library book pile.

The other type of books we tend to purchase are resource type books.  My daughter really loves maps and map books, so we like to look for those.  It's something she uses often enough and at sometimes random enough times that having them in the house or car forever just makes sense for us.  Another great resource, which I have only recently begun to explore with her, is learning a second language.

I was asked by Carolyn Woods, the author of the Lightning Fast language learning books, to review one of her books, so today I'm reviewing a fantastic little book called Lightning Fast Italian For Kids and Families.  This is the type of book I would buy and I plan to add more of these books to our collection very soon!


I have always heard that children have a natural knack for learning second languages. Their little brains just wrap around that type of learning early in life so getting them started when they are young is really great!  After receiving our book in the mail, I pulled it out after dinner one night, talked for a few minutes about how we are part Italian, and asked her if she would like to learn some Italian.  Her eyes popped out of her head as if to say, "Is that really possible?!" and her words said something like "YES!  YES!  YES!"  So we had a little Italian language learning session on her bed, and it was really, really fun!


We started this little Italian language exploration about a week ago, with no prior knowledge of the language (other than a couple of random words that have been passed down through my family that I'm not even convinced are real Italian but are probably some sort of slang or bad words!).  After a week of owning this book, we are not fluent in Italian.  Now, if we did not all have head colds right now, I think we would be remembering the words a bit more, but regardless, this is a new thing for us that has actually been very eye opening and fun.  But, even though we are not fluent (yet!), we have a new love for language learning.  I have a 3 1/2 year old that, when looking for something to do, asks me if we can learn more Italian!

This book really makes the experience fun because it lets you start from scratch, with no knowledge of the language you are learning.  It includes phonetic pronunciation guides for each word presented. There is no way I could do it without that!

In this book, you will find different vocabulary and conversational ideas centered on different topics which are applicable to day to day activities.  For instance, there are chapters entitled Getting Dressed, My Toys, How Was School Today?, and Time for Dinner!, and the words and phrases included in those chapters are the ones your child would want to learn in those contexts.  During our first session, my daughter was doing what most children probably would... asking me how to say certain words that came to her mind... things like pizza, pajamas, dog, and strawberries... and of course, those words were included in the book!  It's interesting to read in the author's introduction that this is how she actually came to create these books... she thought about what her family discussed on a daily basis, translated those things into the languages they wanted to learn, and voila! (that's French, not Italian, right?)  I'm glad she put these books together the way she did because it seems like her family talks about all the same things our family talks about (and probably yours too!).

The book also includes some game and activity ideas to pull all the information together in a fun way and really help cement the information in your memory.  Even the Hokey Pokey is included!  How fun is that?!

We have had a lot of fun with this book and stretching our brains in a way we haven't done before.  She has asked if we can learn Chinese next and thankfully Carolyn does offer that as well!  The Lightning Fast books are available in Spanish, French, Italian, German, Chinese, and Japanese.

The only thing I would have loved to see in this book are some illustrations or photographs to allow for a little more individual learning for young children who are not yet reading on their own and just love the visual appeal of bright colors and pictures.  Of course, the pictures are not necessary because the information is all there in writing, but I think it would be a nice touch, especially for the younger children like mine (3 1/2 years old).  I can certainly create some colorful flash cards or something on my own to help practice but it would have been nice to have something like this included.  Although, given that the focus is on conversation versus traditional language studying, I can understand why it's not.

Regardless, I definitely recommend this language learning series to you!  And yes, I recommend that you purchase them (see, I'm not totally anti-book-purchasing!) because you'll want to keep them as a resource.

You can find the Lightning Fast books on amazon.  They are available both in kindle form and paperback!


Have you explored a second language with your children?

I received free product to facilitate this honest review.  
All opinions expressed are my own.

Thursday, May 29, 2014

Why I don't buy books for my child...

Before I became a parent, and really after I became a parent, when my daughter was very young, I pictured owning a bookshelf with hundreds of children's books.  I pictured a child who loved books, bookshelves with a plethora of good books to choose from, and gifts of books at every appropriate occasion.  It just felt like that's a part of what good parenting and educational motivation would be.

Well, now that our daughter is almost four years old, let me tell you the reality.  Our bookshelves are full of books that she barely looks at.  Santa and the Easter Bunny both tried to bring books to her this past year, and all of those books sit on the bookshelf, yet to be read.  I rarely, if ever, buy books for my child.

But... I have a child who loves books.  We have a more than a plethora of good books to choose from.


We have a nice, ever-changing, pile of books that sits on the floor of our living room, next to the fireplace and it's usually filled with books that I would have never purchased for my child.  And my child is learning about things that I never would have thought to teach her about this early in her life, like U.S. Presidents and the lifecycles of trees and bees.

We spend about an hour each week at our local library, and we love it!  Love, love, love it.

Did I mention that we love the library?  Maybe we're even proud to say that we're a little bit obsessed with the library.

We go weekly and switch out our books and learning materials for new ones.  We take out anywhere from 15 to 20 books each week (I know, it's a lot) and usually one learning kit which typically includes books, videos, and toys all around a specific theme (this is how she got hooked on the presidents).

In preparation for our recent trip to visit family out of state, there were several texts back and forth with family members to plan trip details.  One of those texts from my husband to my mother in law was, "Do you have a library card?"  And sure enough, once we arrived, before we headed out to the playground or to visit family, we stopped at the library!

When my daughter was younger, we took advantage of library programs in an effort to get out and about a bit during the week rather than staying cooped up at home.  Most local libraries offer story times, movie nights, craft days, and other fun, most often free, programming.  We would attend those programs, although we didn't borrow books initially (I was still on the "I will buy books for my child that she will love" kick).

One day, when my daughter was about 2 1/2, I asked her if she wanted to borrow some books from the library.  Her eyes lit up, and the rest is history!


We've come across some really great books, authors, and topics that we probably would not have otherwise, if it weren't for the variety at the library.  I try to keep track of the books we've read in goodreads and rate them so that I'll remember what we might like to try to borrow again someday.  There have been a few of these favorites that I have purchased, either new, or at the used book store (another fantastic place), however interestingly enough, these books now sit on the bookshelf unread since purchase!  We've worked our way through several new favorite authors and even will sometimes go online to our library website and request books that they do not have but can get from other libraries all over the state and deliver to our local library for us to pick up and borrow.  I sort of feel like we have the whole world right at our fingertips!

So, I just wanted to encourage you today to check out your local library, if you don't already!  It has been such a great resource for us and something for which I am so thankful.  It's brought about some really neat things in my little girls' love for learning that I think we would have missed out on otherwise.

Does your family frequent the library?  Do you and your kids have some favorite books?  Some of our favorites right now are the Ladybug Girl books by David Soman, anything US Presidents related, and This Tree Counts and These Bees Count by Alison Formento (I just checked goodreads and see that she has some other books in this series too that I will be looking for on our next trip!).  We are obviously always looking for new books to check out (literally and figuratively), so please do share your favorites!  And feel free to connect with me on goodreads so we can share recommendations there too!  I haven't updated in a few weeks... better get on that now!


Wednesday, May 28, 2014

Pixie Dust Playdough

Do you have a favorite homemade playdough recipe?  Or many?  I ask because I realized this morning that this is the third playdough recipe I am posting on this blog!  We already have favorite recipes for just plain old homemade playdough and Kool Aid colored and scented homemade playdough... you can view both of those recipes here.  I guess we just love playdough and each of these recipes kind of serves a different purpose for us.  If you have a favorite, I hope you'll share it with me because I obviously am always open to new playdough ideas!

Pixie Dust Playdough is full of glittery, fruity goodness!  There is something about glitter that just really gets little kids excited... and gets parents in a state of panic.  At least that's how it is in our house.

I recently bought my daughter this Sofia The First shirt with glitter on it.  I had some speculations from the picture online that perhaps it was going to be a glittery mess but then I thought, would someone really make a glittery shirt that spread glitter all over the house?!  Definitely not.  Well, I was wrong.  This, of course, thrilled my almost four year old... while I began to lose my mind.  I did not love the shirt until I washed it about four times to get all the excess pixie dust off!

Anyway, back to this glittery playdough that is probably causing you the same panic it originally caused me... It is scented and colored with Kool Aid and is a perfectly soft and squishy, non hand staining playdough that does not leave glitter all over the place!  Trust me, I was super nervous but decided to take one for the team and have thankfully found very minimal glitter residue leftover after making and playing with this!  I was surprised!  I guess that's what makes this stuff so magical!

What you'll need:

  • 1 cup flour
  • 1 cup water
  • 1/4 cup salt
  • 1 tablespoon vegetable oil
  • 2 teaspoons cream of tartar
  • 1 packet unsweetened kool-aid
  • glitter

What you'll do:

  • Add everything to a pot and stir well
  • Heat on medium and stir constantly
  • Mixture will quickly begin to get clumpy and start to darken
  • Continue to mix/flip until color and texture is even
  • Scoop onto counter, and once cool enough to handle, knead until squishy (my favorite part of making homemade playdough is kneading the hot dough!)
  • If the middle is still gooey, just put it back in the pot for another minute or so

We named this Pixie Dust Playdough when we used it as a party favor for the guests at our Disney party.  Add a little sparkle to your next batch of homemade play dough.  I bet it adds a sparkle to the eye of your little playmate!

We have had some of this play dough stored at room temperature in a sealed storage container for three months and it's still usable.  It is just now starting to dry out a bit.

The Creative Mama has a great tutorial for how to make glitter play dough with fantastic process photos.  I worked with the recipe posted there.  

Monday, May 26, 2014

Pure & Essential Minerals ~ Organic Morocco Argan Oil Hair Treatment Mask

Disclosure: I got this product as part of an advertorial. 
I received free product to facilitate this review.  All opinions expressed are my own.

Lately I've been getting really annoyed with my hair.  I guess I would describe it as chronically unruly!  I do get compliments on it, but I feel like it's out of control and really complicated for me to manage.  I'll admit that I don't take good care of it and even rarely get it cut because I'm way more focused on taking care of the rest of my family rather than myself!

I have thick wavy-to-curly hair and have basically three options for managing it:
  • dry and straighten it
  • add gel and scrunch it
  • pull it back and hide it

The most annoying thing to me is that regardless of the option I choose, I still have fly-away hair on the top of my head that scrunches up and looks frizzy and awful.  I know I'm probably way more self conscious about it than I need to be and I'm sure I notice it way more than anyone else does, but it still bothers me!  I have various products stashed away in the bathroom closet that I'll slap on my hair to try to tame it better but there hasn't really been anything that I love so when I was asked by Pure & Essential Minerals to review their Organic Morocco Argan Oil Hair Treatment Mask, I was excited!  Any opportunity to tame my hair sounds like a great opportunity to me and any product that actually does tame my hair, is a great product to me!


The Organic Morocco Argan Oil Hair Treatment Mask comes in a small round tub with a twist top.  After shampooing my hair in the shower, I scooped out a generous portion of the product and worked it through my hair, from roots to edges, and let it sit for about five minutes.  I used it in place of my typical conditioner.  I then rinsed my hair thoroughly, got out of the shower, and brushed my hair as usual.  I was rushed so decided to go the "add gel and scrunch it" route and then went about my day, waiting for my hair to air dry so I could see the results.  I was pleasantly surprised!  After only that one use, I had minimal yucky fly-aways on the top of my head!  My hair felt significantly softer than usual, even with gel in it, but it was not greasy at all!  One use, folks!  Know what this means?  I love this product!  Today I plan to try it and use the "dry and straighten it" route to see if the results are as good.  I have no doubt that they will be because I typically have more fly-aways when I don't dry and straighten.

I am so excited to have found a product that takes care of my main hair issues, after only one use!

The only downside with this product, in my opinion, is the size.  If my hair were finer or shorter it wouldn't be such a big deal, but my hair is thick and medium to long in length and I felt like I needed to use a lot to really work it in there.  I don't expect that this little tub will last long.  I'll be sad to see it go!


I received one or more of the products mentioned above for free using Tomoson.com. Regardless, I only recommend products or services I use personally and believe will be good for my readers.

Friday, May 23, 2014

Mickey Mouse Sun Catchers


Crafting sun catchers is so easy and fun and the outcome is super cute!  We did this with three and four year olds and they needed a bit of assistance from grown-ups, but not much.  You could certainly make these with older kids as well and create more elaborate designs, sizes, and themes if desired.  This is a perfect party activity or even something fun for a rainy day!  We've made them in some different shapes but we'll stick with Mickey on the blog today as we gear up for the Disney Social Media Moms Celebration next month!


What you'll need:
  • Clear transparency paper
  • Colored construction paper or card stock
  • Tissue paper or streamers cut into small pieces
  • Liquid glue
  • Water
  • Small bowls
  • Paintbrushes

What you'll do:
  • Create a Mickey Mouse template on paper and trace onto construction paper or card stock.  You will need two Mickeys for each sun catcher.
  • Cut out the Mickeys and then cut a circle out of the center of each, leaving the ears intact, if desired.
  • Trace the Mickey Mouse template onto transparency paper and cut them out.  You will need two of these per sun catcher as well.
  • Add a small amount of water to a small amount of glue in each bowl and mix with paintbrush.  It should be quite runny.
  • Place small pieces of tissue paper onto one transparency sheet of Mickey's head and gently brush over with diluted glue.  Continue to add tissue paper until the center is covered.  You can skip the ears because they will be hidden by the construction paper.
  • Brush glue onto the second transparency sheet of Mickey's head and place over top of tissue paper.
  • Brush glue onto edges and ears of construction paper Mickeys and add one to the top and one to the bottom.
  • Once dry, you can set it in the window or punch a hole and hang from a string.


These are so cute and versatile!  Simply make a different template for any theme you love!

Photos courtesy of Keiko S. Dowell Photography

Craft inspired by Jeanette Stevens Haines in the Disney Side @ Home Celebrations Facebook group.

Kitchen Essentials from Home-Complete

Disclosure: I got this product as part of an advertorial. 
I received free product to facilitate this review.  All opinions expressed are my own.

I love creating fun food in my kitchen so I was thrilled to be asked by Home-Complete to try and review a few of their products!  I was excited to put them to work in my kitchen and am glad to have added them to my collection of gadgets.

Spiral Slicer
This is a product I was really excited about trying!  This is a tool that you basically use like a pencil or crayon sharpener and it easily slices your hard vegetables.  I have an obsession with cucumber salad and thought this might be a fun way to cut my cucumbers so I gave it a try for that.  I didn't initially realize that the slices would be quite as thin as they were.  They really come out like noodles!  It wasn't really what I was looking for in my cucumber salad recipe so I only used it for half of my cucumbers but it actually created a nice touch.  I was a little bit nervous about cleaning this product given the blades and the fact that there was quite a bit of juicy cucumber stuck inside the blades.  The product comes with a little cleaning brush so you don't slice your fingers, but even better than that, it's dishwasher safe.  I placed it on the top rack of my dishwasher and was convinced it was not going to come out clean.  I was wrong!  It came out perfectly clean!  I'm now on the hunt for yummy recipes that use noodle-like veggies.  It is great that when you register your tool with Home-Complete online, they will give you access to a recipe booklet for free!


Ice Ball Maker
Okay.  So I was like, "What?!  What is an ice ball maker?"  I've never heard of ice ball makers and had no clue why I would need to use one.  Regardless, I followed the instructions on the packaging of my Ice Ball Maker and froze up some ice balls.  While waiting for them to freeze, I jumped on the computer and googled the benefits of ice balls.  Apparently, because of their spherical shape, ice balls melt more slowly than ice cubes, keeping your drink colder longer, and keeping it from being diluted!  Who knew?!  This is great for someone like me, often distracted by parenting, blogging, or social media-ing who ends up drinking very slowly and letting my cold drinks get warm and my warm drinks get cold!  This ice ball maker is a silicone mold that makes four ice balls at a time, each 2 inches in diameter.  The mold is BPA free and made from safe, FDA approved, food grade material.  The instructions for use are a little bit unclear in that they state that you need to fill with water to the line, but I could not find a line.  Regardless, it was pretty foolproof and they turned out just fine anyway.  If you fill it too much, the little holes in the top will let the water spill over.  I'm hooked on our new ice ball maker!


Digital Meat Thermometer
This was the product that I was the most skeptical of.  I have been using a different brand meat thermometer for many years and I trust it.  It's not digital which I thought was maybe it's only downfall, except that I was a little skeptical of trusting a digital thermometer anyway so I wasn't really in the market for one.  I was shocked when this meat thermometer arrived.  It's long!  Very long compared to my current meat thermometer.  It has an 8 inch stainless steel probe.  This length in a meat thermometer is a great safety and convenience feature!  This thermometer was very easy to use, with easy to follow directions, battery included, and a clear and easy to read high definition LCD display.  I got the reading quickly and accurately.  I used it to check my chicken but given that I was unfamiliar with it, I was skeptical of believing it was accurate so I pulled out my old trusty meat thermometer and tested with both.  They both read the same temperature but the digital one obviously gave me a more specific temperature reading which I loved!  The thermometer is BPA, Lead and Phthalate free and is easy to clean by rinsing the tip under hot water.  It comes with a sturdy, protective, probe case.

If you're in the market for some new kitchen gadgets, give these a try!  They each offer a 100% lifetime money back guarantee so there's nothing to lose!


 I received one or more of the products mentioned above for free using Tomoson.com. Regardless, I only recommend products or services I use personally and believe will be good for my readers.

Thursday, May 22, 2014

Add some extra clean to your bathroom routine with Cottonelle!

This post is sponsored by Cottonelle through Linqia.  All opinions expressed are my own.


We spent last week visiting family out of state.  It was a fantastic trip, but regardless of how fantastic a trip is, it always feels good to get home!  I'm always sad leaving but then about halfway through the first leg of flights back I start getting antsy for my own bed, my own kitchen, and my own bathroom!  This time I was super smart and cleaned my house spotless before I left for vacation and when I walked in the door, that excitement of returning home was even more intense than usual.  It wasn't just home.  It was a clean home!

Speaking of clean... I was pretty excited to be invited to participate in a campaign for Cottonelle through Linqia this week.  It's all about clean bums.  Yup.  Clean bums.  I just wrote that on my blog. If you follow the hashtag #LetsTalkBums on social media, you'll be able to jump right in to the hype of a wet+dry combination that brings clean to a whole new level!  When you use Cottonelle Clean Care Toilet Paper along with Cottonelle Flushable Cleansing Cloths, you'll pamper yourself in a way you won't regret!

My sweet daughter came down with tonsillitis on our trip last week requiring a trip to Urgent Care and a prescription for antibiotics.  We followed up with the pediatrician yesterday and ended up with a second prescription to fill.  All the way from the pediatrician's office to CVS to pick up her prescription, she repeatedly told me, "I'm not feeling too good today, Mommy."  Poor thing!  We stopped into CVS for the prescription and picked up some toilet paper and flushable cleansing cloths ("special wipes").  We handed over our CVS card and coupon, paid for our things, and headed home.


Cottonelle Clean Care Toilet Paper is our toilet paper of choice.  It's strong and it doesn't take a lot to get the job done.  We had never tried the Cottonelle Flushable Cleansing Cloths before now.  Given that my daughter was feeling crummy and experiencing some bathroom related side effects from antibiotics that we will not discuss in detail here, she was excited for a little extra pampering with some "special wipes" when we got home.  We typically use a different brand of flushable wipes for kids, but now that we've tried these, we've decided that the Cottonnelle Flushable Cleansing Cloths are our new favorite!  They smell great and are perfectly moist; wet enough to have the desired effect but not so wet that they don't dry quickly, letting little ones (and grown-ups!) get back to what they are doing outside the bathroom quickly.  The dispenser they come in is classy and totally will not embarrass you while it sits in your bathroom.


Have you tried the Cottonelle wet+dry combo?  If not, you should!  Here's a coupon to save you $1.50 when you pick them up at CVS!


By the way, these goodies are not just for kids!  This morning, during my bathroom alone time (since my little one was at preschool... bathroom alone time is typically rare...), I tried them for myself and fell in love.  Well, as much as you can fall in love with a flushable cleansing cloth!  So you can take my 3 1/2 year old's word for it, or mine, but regardless of which holds more credence to you, print your coupon now, and head to CVS today!  

Add a little extra clean to your bathroom routine!

This post is sponsored by Cottonelle through Linqia.  All opinions expressed are my own.

Wednesday, May 14, 2014

Make Your Own Water Bottle Labels

photo credit: Keiko S. Dowell Photography

There are some things that look way more complicated than they are.  I'll see something online like, say, water bottle labels, and think, "Wow, those look so cool!  I wonder if I could do that..."  The answer, for any of you asking that same question is "YES!  Yes you CAN do that!"  There aren't many things that are simpler but the end result is fantastic and adds such a fun aspect to your party or get-together!  You could even do this to surprise your kids after school.  It's that easy.

Take Time For Today.  Take a few extra minutes to add a little something special to your day.  I know they are just water bottles, but picture the wide eyes and smiles when your family opens the fridge tonight!  It's worth it!

Here's what you'll need:
  • Water bottles
  • Clear packing tape
  • Strip of paper that matches the width of the original bottle labels (If you want to make something fancy, you can search online for templates in many themes.  I used a free printable download from Piggy Bank Parties and then added a Mickey Mouse head inside the circle to customize.  You could also take off the original labels but I found this unnecessary and I'm all about simplifying where I can!)

Here's what you'll do:
  • Make sure your water bottles are dry
  • Cut a strip of packing tape a bit longer than your strip of paper
  • Lay the packing tape sticky side up on a flat surface
  • Carefully place your strip of paper, decorative side down on top of the packing tape
  • Lift up the packing tape, with label now sticking to it, and wrap carefully around label of water bottle
  • You can store in the fridge to keep cold

See?  You can totally do it!  And I'd love to see pictures of what you create!

Tuesday, May 13, 2014

Minnie Mouse (or Mickey Mouse) Headbands

Do you love the Minnie Mouse Headbands we are wearing in our Disney Party Planning video?  We do!  I am so thankful to have found the most AMAZING tutorial, both in written and video form, for making these over at The Surburban Mom!  I am not going to begin to try to replicate it, I'm just going to send you over there and let Jen teach you how to do it.  I know there are people you could purchase from on ebay or etsy but these really are not difficult at all and the supplies are not expensive.  This is a totally perfect DIY that creates a finished product that your little ones (and YOU) will love.


Here is what you'll need:
  • Plastic headbands - I used ones similar to these
  • Black felt - buy it by the yard at the craft store
  • Foam Sheets
  • Hot glue gun and lots of glue
  • Pink polka dot ribbon
  • Chalk
  • Marker
  • Ribbon or rubber bands

Here is what you'll do:
  • Go check out The Suburban Mom's tutorial and follow along!  She will give you more details about the supplies you'll need as well as the process.

The only thing I did differently with our headbands was the bows.  Rather than securing them with ribbon, I used small rubber bands, the kind you might have in your Rainbow Loom kit.  I just wrapped one around the middle and then slipped it over the headband.  It's probably not quite as secure but I have plenty of rubber bands and can fix it if needed.  I'm all about using what I already have on hand (in case you hadn't figured that out about me yet)!

Once you've mastered these, you will become a themed-headband-a-holic like me!  I can't plan a party without creating a themed headband now!  Stay tuned to see what else we've made following this general outline.

I can't wait to see what you create!
Related Posts Plugin for WordPress, Blogger...