
Monday, May 12, 2014
Budget Friendly Ideas for your Disney Party!
Here's a little video that my 3 1/2 year old and I made a couple of months ago to share how we pulled together a fantastic Disney themed party without breaking the bank!
What are your favorite ways to stay frugal while party planning? I'd love to hear!

Homemade Pizza Dough - no yeast needed!
I wouldn't necessarily say that I have a "yeast-phobia" but I'm going to put it out there that I have NEVER cooked with yeast. At least not that I remember. I don't really know why. I guess maybe I just never have it and every time I've needed it and googled an alternative recipe that didn't use it, I've found what I've been looking for.
So given the popularity of the recipe I posted in the past for homemade biscuits with no yeast, I figured it was worth sharing the recipe that I've been using for pizza dough with no yeast! I clearly am not the only person out there that cooks without yeast!
We love this pizza dough. It's so easy and I always have the ingredients on hand. Sometimes when you find a recipe online, like I did this one, you never really know how it's going to turn out. I'm here to tell you that this one is just what we were looking for... hopefully you'll love it too! Let me know!

Ingredients
Directions
You could use a stand mixer to save yourself some effort but I don't work hard to make this and doing it by hand saves me from some extra dirty dishes!
Adapted from the Canadian Moms Cook recipe found here.
So given the popularity of the recipe I posted in the past for homemade biscuits with no yeast, I figured it was worth sharing the recipe that I've been using for pizza dough with no yeast! I clearly am not the only person out there that cooks without yeast!
We love this pizza dough. It's so easy and I always have the ingredients on hand. Sometimes when you find a recipe online, like I did this one, you never really know how it's going to turn out. I'm here to tell you that this one is just what we were looking for... hopefully you'll love it too! Let me know!

Ingredients
- 2 cups flour
- 3/4 teaspoon salt
- 2 teaspoons baking powder
- 1 teaspoon garlic powder
- 2/3 - 1 cup water
- 2 tablespoons olive oil
- Desired sauce and toppings
- cornmeal (sprinkle on pan to prevent sticking)
Directions
- Preheat oven to 425°
- Sprinkle pizza pan or stone with cornmeal
- Whisk together dry ingredients
- Gradually add water and mix with fork until a ball of dough forms
- Remove from bowl to generously floured surface and work with hands a few times (I often add a little more flour since it's pretty sticky)
- Roll out to desired size and thickness (you can do this on the floured surface or on the pan)
- Brush on olive oil
- Spread on sauce
- Add cheese and toppings
- Bake for 20 minutes
You could use a stand mixer to save yourself some effort but I don't work hard to make this and doing it by hand saves me from some extra dirty dishes!
Sunday, May 11, 2014
Mickey Mouse Washer Necklace
During the planning process for our Disney party this past winter, I scoured Pinterest looking for every Disney themed craft, project, recipe, and party favor I could find. I came across the sweetest Mickey Mouse necklaces made from washers and I knew they would be perfect for us! Here's why:

Here's what you'll do:
Adapted from the Becky Anderson Photography tutorial found here.
- My daughter and all of her 3 and 4 year old friends would love the sparkly glamorousness of Mickey Mouse jewelry.
- My husband would help me make them since, even though they were jewelry, they were made out of things from the hardware store.
I was right about both things!

These necklaces were a huge hit at our party. They were not difficult to make and they really added a fun touch to our celebration.
Here's what you'll need:
- Appropriately sized flat washers, 2 small and 1 large for each necklace (Just play around with them at the store a bit and see which ones look right for the size you are going for)
- Nail polish (I used red and sparkly)
- Gorilla glue
- String
- Beads
- Clamp or clothespin to hold washers in place while the glue dries
Here's what you'll do:
- Cover your work surfaces. You don't want nail polish or gorilla glue getting on anything!
- Paint all of your washers with nail polish. I put 2 layers of red and then covered with a layer of glittery goodness after the washers were glued together.
- Once dry, add string and bead as seen in photo
- Glue the two small washers onto the larger washer for ears (this was my husband's job so if you need more details, let me know!)
- Once dry, scrape off any excess glue
- Add nail polish to cover any glue you couldn't scrape off. I was making these for 3 and 4 year olds so they did not need to be perfect. You may choose to use more care in glue application than we did.
Adapted from the Becky Anderson Photography tutorial found here.
Friday, May 9, 2014
I'm Going to Disney Social Media Moms Celebration On-The-Road!

This week I was extended a very exciting invitation and I just submitted my RSVP! I was invited by MomSelect and the Disney Parks Social Media Moms Celebration Team to attend the Disney Social Media Moms Celebration On-The-Road this summer!
I should give some context by saying that earlier this spring, I received the most shocking and exciting email ever. It came to me, totally unexpectedly one evening, from Walt Disney Parks & Resorts Special Events, inviting me to the Disney Social Media Moms Celebration at Disneyland in California, an invitation only conference for about 200 bloggers from all over the country. You don't apply for it… you just get noticed and invited. It was such an honor to receive this invitation. It's kind of like the invitation you can't refuse… except that I did. I remember googling, "Can you say no to the Disney Social Media Moms Celebration?" It was so sad! I cannot even describe the pit in my stomach when I had to RSVP with a big fat "no thanks." If I had had any inkling that I would have been invited, my schedule would have been clear and I would have had a little savings account ready to access to get us there! But I had no expectation of being invited to this event at all. Unfortunately airfare from here to California was through the roof and we had literally just planned another trip for within a month of that one. There was just no way for our family to swing it. Needless to say, I was devastated.

That celebration has since come and gone, and I have to say, even though I wasn't able to attend in person, I followed along on social media and felt like I was practically there! The attendees were live tweeting, instagram-ing, and facebook-ing throughout. It was fantastic and actually a whole lot of fun to be a part of, even from home! I learned a lot and was actually really grateful for the opportunity!
The Disney Social Media Moms Celebration Team wants to include as many moms as possible in their events so they have created some On-The-Road Celebrations at scattered locations throughout the summer and have extended invitations to those over the past week. Pixie dust landed in my email inbox again on Monday and I'm headed to Philadelphia with my family this summer for what I think will be a super fun, super informative, super motivating, and super amazing half day conference. I couldn't be more excited!
I'll be live social-media-ing (is that a word?!) the event, so I hope you'll follow along the way I did to the Celebration at Disneyland! The big day is Thursday, June 19, and we'll be going strong from 7:30 AM through 12:30 PM, so be ready! You can follow me at any of these locations but I expect twitter to be the most active:
Twitter: https://twitter.com/loriann978 (or follow the hashtag #DisneySMMoms)
Facebook: https://www.facebook.com/TakeTimeForToday
Instagram: http://instagram.com/loriallinder
Thanks for joining me on this exciting journey!
Tuesday, May 6, 2014
Refreshingly Sweet Cucumber Salad
So last night I put a good deal of effort into figuring out how to carefully pour cucumber salad juice directly from my empty dinner plate into my mouth.
True story.
It was then that I realized that I have finally discovered the very best cucumber salad recipe and that I must share it with you! It is sweet, tangy, and refreshing. It will be perfect for when you have a plethora of cucumbers in your garden this summer, but don't wait until then! Run to the store and pick up a cucumber now!

Here it is, friends…
Ingredients

Directions
Adapted from the recipe found here.
True story.
It was then that I realized that I have finally discovered the very best cucumber salad recipe and that I must share it with you! It is sweet, tangy, and refreshing. It will be perfect for when you have a plethora of cucumbers in your garden this summer, but don't wait until then! Run to the store and pick up a cucumber now!

Here it is, friends…
Ingredients
- 1 large cucumber, thinly sliced
- 1 small white onion, thinly sliced
- 2 celery stalks, thinly sliced and diced
- 1/2 cup white vinegar
- 1/4 cup water
- 1/4 cup +2 tablespoons sugar (or 6 tablespoons sugar)
- 1 1/2 teaspoons dry dill

Directions
- Mix cucumber, onion, and celery in large bowl
- Mix vinegar, water, and sugar together in small pot on stove and bring to a boil
- Pour liquid over vegetables
- Mix in dill
- Cover and refrigerate for at least one hour (the longer, the yummier)
- Serve cold
Adapted from the recipe found here.
Tuesday, April 29, 2014
Delicious and Easy Homemade Baked Ziti
There has been lots of fun stuff on the blog lately, but let's not forget to eat! Here is one of our family's favorite recipes. It's always nice to find something that we will all eat… especially something that gives us leftovers!

My friendship with this wonderful baked ziti recipe has been going strong for over two years. I just looked and saw that I printed the original recipe from the computer on March 1, 2011. I did a google search that day for a Baked Ziti Recipe and this is what I found. Anyone who knows my southern husband, who bravely married me, a northern girl, knows that any recipe I find with "southernfood" in the url is a winner in our household. This one did not disappoint! You can view the original recipe here or follow along below.
Note: I LOVE LOVE LOVE making this recipe in my Pampered Chef RockCrok. If you are in the market for a new pan or pot, this is a must have. It is refrigerator, freezer, stovetop, oven, broiler, grill, microwave, and dishwasher safe. Yes, that is all true. You kind of don't even need anything else in your kitchen if you have this, right? It is amazing and it turns this recipe into a one dish meal… and that one dish is dishwasher safe… did I already say that? I have the Dutch Oven size but there is a smaller Everyday Pan as well.
Okay, back to the recipe.
Ingredients:
- 1 pound ground beef or pork
- 1/2 cup chopped onion
- 1/2 cup chopped green pepper (just chop up one bell pepper, measurements don't need to be exact… or frozen is fine too)
- 1 can (14.5 ounces) diced tomatoes, undrained
- 1 can (8 ounces) tomato sauce (or mix a small can of paste with a can of water over low heat until combined and use that - I always have more paste than sauce around here!)
- 1/2 teaspoon dried basil
- 1/2 teaspoon dried oregano
- 1/2 teaspoon garlic powder
- 1 1/2 teaspoons salt
- 1/4 teaspoon black pepper
- 8 ounces ziti or elbow macaroni, cooked and drained
- 2 cups (8 ounces) shredded mozzarella cheese, divided
Directions:
- Sauté ground beef, onion, and green pepper in a large skillet until onion is tender and beef is lightly browned and cooked through.
- Drain off grease.
- Add tomatoes, tomato sauce, basil, oregano, garlic powder, salt, and black pepper (if you don't think there is room in your pan, just do all this in a big bowl or transfer it now to the casserole dish for stirring and cooking… or get a RockCrock)
- Stir well.
- Stir in cooked pasta and 1 cup of the shredded cheese.
- Transfer to a 2 1/2 quart casserole dish (9x13) (or if you cooked AND mixed in the RockCrok already, you can just put that same pan it in the oven).
- Top with remaining cup of shredded cheese.
- Bake at 350° for 25-30 minutes, until hot and bubbly.
This recipe is delicious right out of the oven and just as yummy for leftovers!
I love feedback and love recipe sharing, so let me know if you try this and love it or have another recipe for me to try next time!
Monday, April 28, 2014
The Happy's Playdate
I received free products in order to host the Cepia, LLC sponsored MommyParty.
The opinions expressed here are my own.
We have had the opportunity to get to know The Happy's for the past couple of weeks and here are some things we love (verbatim from my preschooler):
- I like when the puppies and kitty spin around.
- I like when they come to me and I cuddle with them.
- I like when they lean back.
- I like when they get the ball.
- I like to hear the sounds when they turn off and turn on.
- I like when they follow the bone.
- Other kids should get The Happy's so then they can invite me!
So, we invited some friends...
Pulled together some pet themed headbands…


some pet themed snacks…


some pet themed crafts…

popped some batteries in The Happy's…

and played!


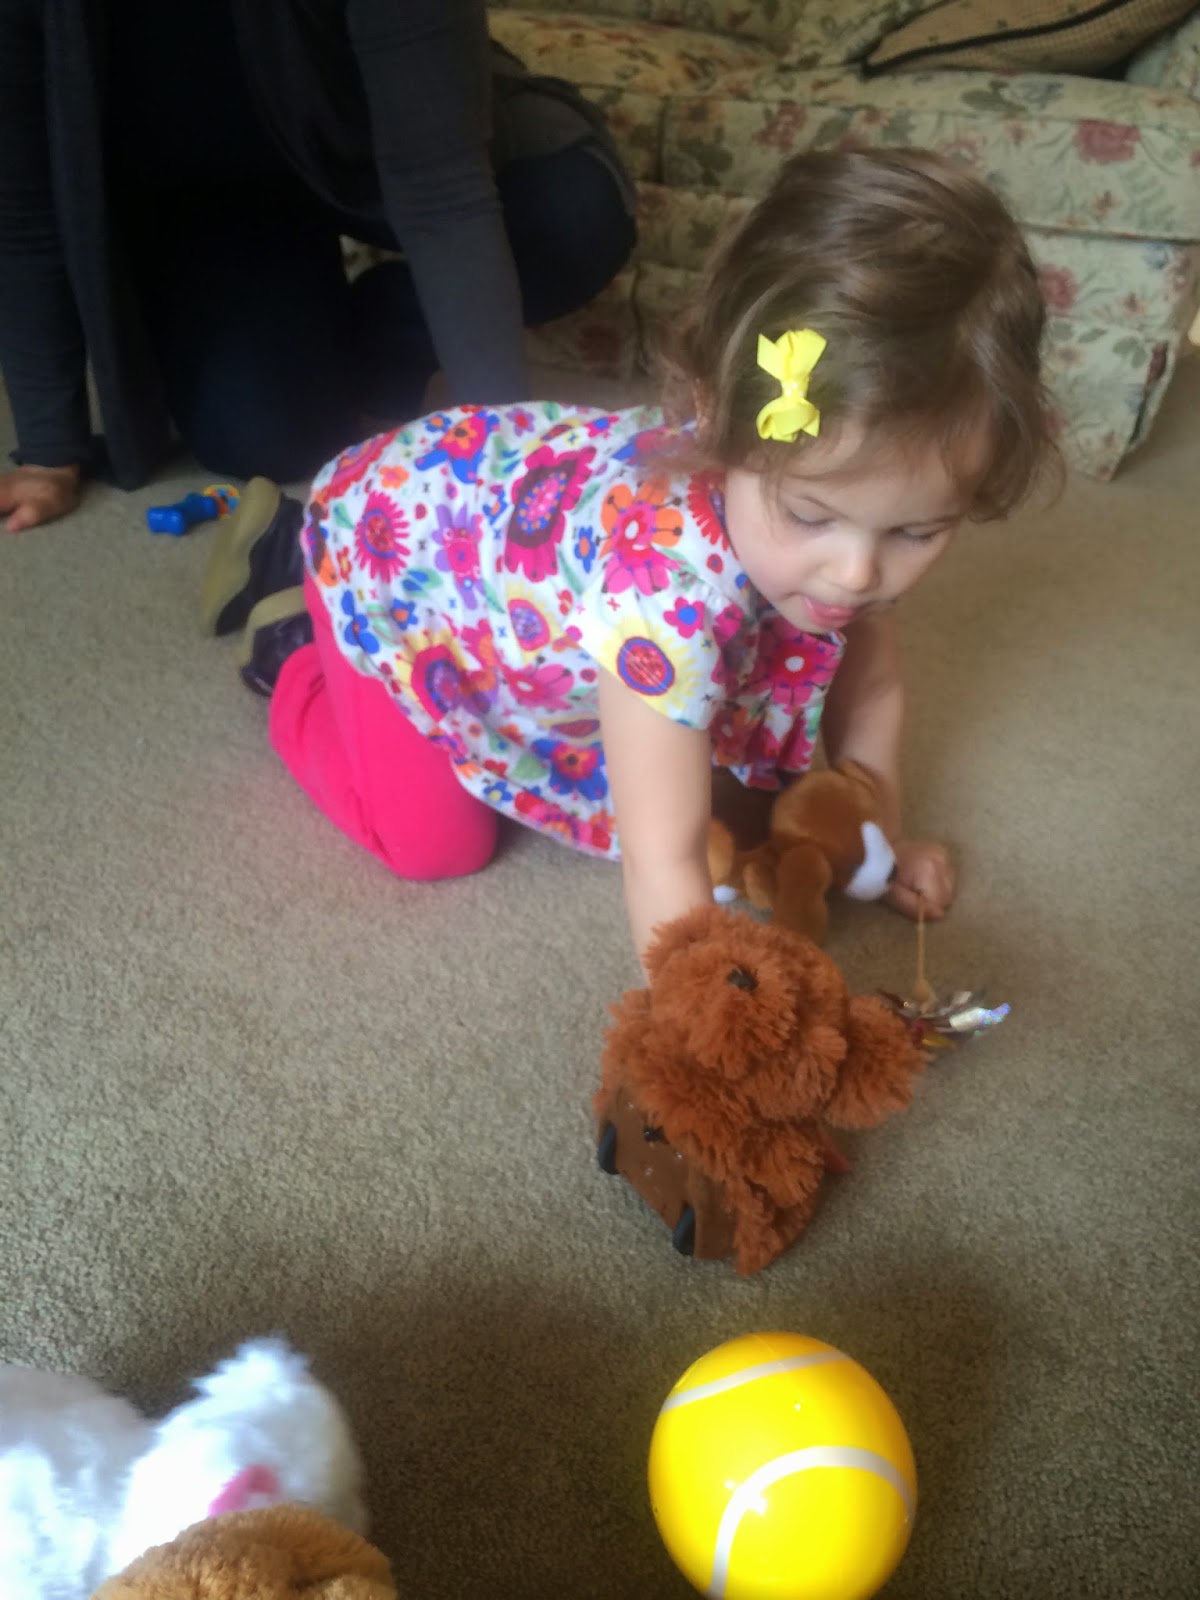

We had so much fun with The Happy's! Everyone loved experiencing how The Happy's interact with each other, their training treats, and us! We watched them beg, pounce, wiggle, and chase their tails. We chased them and they chased us and we all chased each other all around the house. We had a race to see which of The Happy's could find the Chase & Play Ball first (that's what's happening in the photo above). We cuddled them, loved on them, and we mommies noted how nice it was to add a pet to the family that doesn't need to be fed or let out to potty!
The Happy's are so interactive, unpredictable, and totally sweet. It's easy, even as a grownup, to forget that these little cutie pies aren't real! I find myself petting them, calling them by name, looking in their eyes, and talking to them in that high pitched voice you use to talk to babies and pets… and then I remember they are in fact toys and maybe I need to get a grip! But maybe not, because it's healthy for grown ups to have fun too!
The Happy's hit store shelves at the beginning of April and you can find them at Target, Walmart, Toys R Us, and Justice. We can't wait to add some more accessories and pets to our collection. We gave some of The Happy's that came in our kit away to our friends so we can't wait to plan another playdate to get them all back together again… and I wouldn't be surprised if more have joined the crowd by that point! If you're looking to add a new friend to your family, or are looking for a great gift for someone else, consider these cute and cuddly pals. They really are sweet!
Check out this video to see The Happy's in action!
I received free products in order to host the Cepia, LLC sponsored MommyParty.
The opinions expressed here are my own.
Subscribe to:
Posts (Atom)
